skip to main |
skip to sidebar
Whenever someone has an old, overdeveloped, grainy photograph on the wall, don't you just have to go look at it? There's something about not only the age, but the non-perfection of it that makes it captivating. Old pictures are just life. Aunt Ethel is not looking at the camera, the baby started to cry, Dad didn't bother to smile. It's not "Pose for the twentieth time, kids, because I didn't get the perfect shot yet." Unedited life is usually much more interesting than staged pseudo pictures. But while I'm sure I'll never give up getting it just right, I found a way to mess up the newness of them. Did I convince you on the Gimp? Here's stage two: vintage pictures. I'm not going to go into detail here, but viola, my latest messings around:
 Why do I love this picture of Phoebe so much? It's just so...Phoebe. From the chubby wrist wrinkles, to the can't-make-her-smile-for-anything look on her face.
  Brief, hardly in-depth instructions to vintage your photos, although there's probably an easier way and I hardly know what I'm doing to begin with:
1. Get the GIMP. It won't kill you. It's free. Remember? Truth be told, you can do this with pretty much any photo editing program. But those aren't free. So get the GIMP.
2. Pick your photo. I think the un-perfect shots look the most convincing, although we all know the picture of the ballerina above is, indeed, perfect to begin with.
3. Open your photo. If I have to explain how to do this, really, just forget it.
4. Convert your photo to grayscale. Image > Mode > Grayscale
5. Download these two photos to use as additional textures: http://solstock.deviantart.com/art/Gentle-67039239 http://www.flickr.com/photos/katphotos/2189979898/
Right click, save photo as in a place where you can actually remember.
6. With your original photo selected, create a new layer. Layer > New Layer. Bring up the Layers dialog box: Dialogs > Layers. Layers are your friends. It took me a long time to figure this out. Basically you're going to layer these files over your picture and make them transparent so you can see the picture on the bottom. Open both of the textures you saved to your computer.
7. Copy and paste the black border texture into the new layer on your photo. Resize it to fit your picture. To resize, select the tool with the square with the arrow pointing up.
Mess with the transparency so you can see your original through it. To do this, select the new layer in the layers dialog and move the slider under "Opacity." You may also want to mess with the brightness and contrast for your original and the black border texture. To do this, select either layer and click Colors > Brightness & Contrast.
8. Once you're happy with it, create a third layer. Copy and paste the yellow texture onto the new layer. Size it to fit. Make sure this layer's function is not on grayscale. Image > Mode > RGB. Once again mess with the transparency and brightness & contrast.
9. To add a sepia hue (or any other color you may desire), choose your picture or the yellow layer (I messed with the yellow layer). Colors > Color Balance. Add a combination of yellow and red.
10. Mess with your picture until you like it, or until your children start begging you for some food and a fresh diaper. Save your picture with whatever file extension you prefer (I did .jpg). Impress your technologically illiterate friends.
 Dad with his baby.
I am in love with the GIMP. No, I'm not referring to Husband, though I guess he is pretty great too. I mean the totally free graphics program. I have been lusting after Photoshop for a while now. I'm learning how to take better photos and post-shooting computer editing seems to be an important part of the process. Plus, the program is just plain cool. However, I do not have a free limb to sell in order to afford it. But the more I use the Gimp, the more I'm convinced that I don't need Photoshop. Whew. If it's free, it's for me.
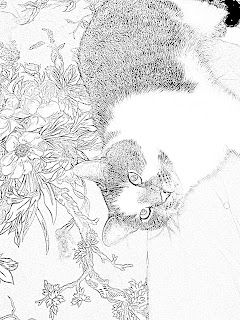
A few nights ago I was messing around with the Gimp (hmmm...) and discovered the Filters menu. I tried out turning my photos to black and white, then using the "Photocopy" option...and viola, awesomely (is a word, like, totally) personalized coloring pages! I really like the look of these, like someone hand drew them. Eowyn has been going through a coloring obsession lately, sometimes spending an entire hour with crayons, and she was most excited to color a picture of our cat.

Eowyn is quite over the top with the cat lately. Whenever she walks by Lancelot, she has to pet him and talk to him in the following fashion: "Oh hi, Lancey Pantsy Poo!! How are you? Yes, ooooo, Lancey, you like that don't you? I love you so much, Lancey Pantsy Poo...." you get the gist. Before she leaves the house she must hug and maul the cat. Before going to her cousins' house the other day she rushed up to Lance and said, "Oh, Lance, you don't think I should go, do you? You think I should stay home with you! But I have to go!" Sometimes I think it's really funny and slightly endearing. Other times it's, "Oh please, will you just leave the cat alone?!"

 Directions to convert your pictures:1. Download the GIMP. 2. Open your picture.3. Convert to grayscale. Image ----Mode----Grayscale.4. Photocopy. Filters---Artistic----Photocopy. Mess around with it until it looks good.

blogger templates | Make Money Online
 Why do I love this picture of Phoebe so much? It's just so...Phoebe. From the chubby wrist wrinkles, to the can't-make-her-smile-for-anything look on her face.
  Brief, hardly in-depth instructions to vintage your photos, although there's probably an easier way and I hardly know what I'm doing to begin with:
  Dad with his baby.


